Oh my, it's already April and I am so behind on my blog! What better way to catch up, then with a Mule Day post of course!
Last weekend, we packed up our car and headed down to Columbia for a fun day with family and friends. I have enjoyed the Mule Day Parade since I was a little girl, and I love that Mike looks forward to all the festivities each year too! Here are a few flashback pictures from Mule Day. I actually rode in a cage with a Llama one year for the parade...no pictures of that.
I can remember getting so excited for the parade when I was a little girl! I always had a fun outfit complete with a cow girl hat and boots of course. My family usually camped out directly across from the Polk Home which was a great spot for the action. It isn't allowed any more, but years ago people would toss candy down to the children as they drove by on their floats. Think small town family fun day!
We are actually really lucky now because Dee Dee lives right along the parade route. So, instead of tail gaiting or getting out super early to save a good spot, we just show up for good food and sit in the front yard! Here we are this year with Miss Abigail waiting for the parade to begin!
It was a beautiful day and I hope Abigail grows up enjoying this tradition as much as I have! She will definitely have a little pair of cow girl boots ready for next year ya'll!
Thursday, April 11, 2013
Saturday, February 16, 2013
Bedtime Fun!
Sometimes I think back to before we had Abigail and wonder what I did with all my time at night. I'm sure Mike and I watched more television and read a few more books, but I would still trade every novel for a little story time and a bath with Abigail. Of course, I love my alone time with Mike after Abigail is fast asleep, but it's funny how we find ourselves laughing and talking about our baby girl and all the funny things she does during the day!
Abigail loves bath time! This was a post I did on her very first bath and from that day on, this little smile has gotten bigger and bigger! I am so excited to take her to the pool this summer because I think she will love splashing around and pouring things over her head. Sometimes she even tries to stick her face in the bath water!
After her bath, Mike and I usually fight over who will get to read her a story. I usually win that one! But every so often, I try to let him enjoy this sweet time at night with her too. Here are a few pictures I got recently of Abigail with her daddy. She loves this book!
I am so very thankful that my husband is so involved with his baby girl. He is right there for every bath and bedtime routine. Abigail is one lucky lady!
Thursday, February 7, 2013
My latest project! {Abigail's Bow Holder}
I totally used to be one of those people that thought it was a little strange to take pictures of what you are working on as you go, but I now REALLY appreciate all the bloggers that explain to me step by step how to make something cute and not spend a lot of money. That being said, I thought I would share how I learned to make a Tutu Bow Holder for Abigail!
I had my eye on the cutest bow holder at Once Upon a Child and I would stare at it each time I went in the store, but it was $35.00 and I couldn't justify spending that much on one, so I decided to search Pinterest for a way to make my own. It turns out they are really inexpensive and easy to make so I thought I would share what I learned!
This is what you will need:
~cardboard box
~batting material
~scissors
~glue gun
~ribbon
~fabric
~tulle
First, you want to make your bodice. The easiest way to do this is fold a piece of paper in half and draw the shape you want and cut it out. That will give you a symmetrical shape.
I had my eye on the cutest bow holder at Once Upon a Child and I would stare at it each time I went in the store, but it was $35.00 and I couldn't justify spending that much on one, so I decided to search Pinterest for a way to make my own. It turns out they are really inexpensive and easy to make so I thought I would share what I learned!
This is what you will need:
~cardboard box
~batting material
~scissors
~glue gun
~ribbon
~fabric
~tulle
First, you want to make your bodice. The easiest way to do this is fold a piece of paper in half and draw the shape you want and cut it out. That will give you a symmetrical shape.
Now you can use this cut out to trace the shape onto your cardboard and cut that out. I used an old box that Abigail's baby gate came in.
Then, you will cut out your batting material and glue that to your cardboard like this.
Next, you cut your fabric to fit your bodice leaving a little extra material around the sides. Cut small slits in the fabric being careful not to get too close to the cardboard, and then pull the material around to the back and glue it down. You will want to start with the middle first and then the shoulders. Leave the top and bottom for last so you can pull out any wrinkles and get a smooth fit.
To make your skirt, you will need to decide how long you want it to be and then make several bundles of tulle. I read a blog that mentioned buying a bolt of tulle but I didn't have that so I used what I had and wrapped it around an old chalkboard and then cut it at one end. The idea is to have several layers of tulle and then tie it off at the end you didn't cut. I also used twine that I had because it was smaller than my ribbon and easier to get a good knot. Once you have made all your bundles you can line then up and get an even cut at the bottom.
Once you have finished making your bundles, glue them to your bodice starting with the outer two, then the middle, then the rest.
Next, cut the ribbon you will use to hang your bows the length of your skirt and glue each one near the top of the bundles. I chose three pieces of ribbon for this one.
To make your waistband, cut 2 pieces of ribbon in a different pattern to place over your bundles and to hide the top of the ribbons and glue that down. Then cut one more piece of ribbon to lay on top and cover your seam.
Now, you can add any embellishments, flowers, ribbons, etc. I wanted a simple one, but there are lots of cute ideas to dress these up! Last, you will glue a piece of ribbon at the top so you can hang your bow holder and voila! You are finished!
This was a super fun little project and only took about 2 hours to make. Mine is definitely not perfect but it was fun to make and I love having somewhere cute to hang all of Abigail's cute hair bows!
Sunday, February 3, 2013
DIY Growth Chart
If you haven't noticed already, I am a tad sentimental and I love to document all the sweet milestones and memories of my little family. So, when I came across a board on Pinterest explaining how to make your own Pottery Barn inspired growth chart, I had to give it a shot!
I am so happy that I did a little research on how to make my own because most ETSY shops sell these boards for around $80.00. Here is a list of what you will need and if you already have a few of the items at home, you can make a growth chart for under $10.00! That's my kind of project.
~ 6ft x 9in board
~ wood stain
~ Minwax Polyurethane ( or wood wax)
~ Sandpaper
~ Sharpie pen
~ Paint Marker
~ Printable Stencils
~ measuring tape
Directions:
First, Pick out your wood. I thought it would be fun to pick out an aged piece of wood somewhere cool, but instead I sent Mike down to the Home Depot for a pre-cut board the size I needed for $8.00. Check!
Next, I sanded the plank down with a piece of sand paper to make sure it was smooth and applied wood stain. We had some left over stain, so I used what we had, but I think it would be fun to pick out an even darker stain and distress the wood a bit more! The hardest part of this little project was waiting for the stain to dry so I could go to the next step. Apparently, it does not dry faster if you stare at it...
I am so happy that I did a little research on how to make my own because most ETSY shops sell these boards for around $80.00. Here is a list of what you will need and if you already have a few of the items at home, you can make a growth chart for under $10.00! That's my kind of project.
~ 6ft x 9in board
~ wood stain
~ Minwax Polyurethane ( or wood wax)
~ Sandpaper
~ Sharpie pen
~ Paint Marker
~ Printable Stencils
~ measuring tape
Directions:
First, Pick out your wood. I thought it would be fun to pick out an aged piece of wood somewhere cool, but instead I sent Mike down to the Home Depot for a pre-cut board the size I needed for $8.00. Check!
Next, I sanded the plank down with a piece of sand paper to make sure it was smooth and applied wood stain. We had some left over stain, so I used what we had, but I think it would be fun to pick out an even darker stain and distress the wood a bit more! The hardest part of this little project was waiting for the stain to dry so I could go to the next step. Apparently, it does not dry faster if you stare at it...
I didn't have number stencils so I just printed numbers from my computer in a Century font size 200-300. Next, I marked along my board using a sharpie at every foot, half foot, and quarter foot. I made my first foot marking 6 inches from the bottom of the board so that I could hang my board 6 inches from the floor and it would be accurate. This also allowed me to have symmetry at the top and bottom of the board.
For the foot mark, I made my line 3" long, the half foot mark 2" long, and the quarter mark 1" long.
If you don't have stencils, I definitely recommend printing out numbers and using a sharpie pen. This was really easy and saved me a little money. I lined my numbers up where I wanted them on my board and then traced over the number with a sharpie pen. It will leave enough ink on the board for you to fill it in with your paint marker.
Okay, now for the big secret. I read a few blogs that mentioned using sharpies to fill in the numbers. Others recommended painting with stencils... After running through 3 sharpies, I got a little smarter and went to Hobby Lobby! This is the most amazing paint marker and made this project a breeze.
After making all my marks and numbers, I let the board hang out in the garage again over night so it could dry really well and then I applied my Minwax Polyurethane.
I am really pleased with how my growth chart turned out! I love that I will be able to document Abigail's growth each year and in the event that we move, I can take it with me. It's also a pretty fun and unique decoration for our home. Here's my finished project!
Saturday, January 26, 2013
Abigail is ONE!
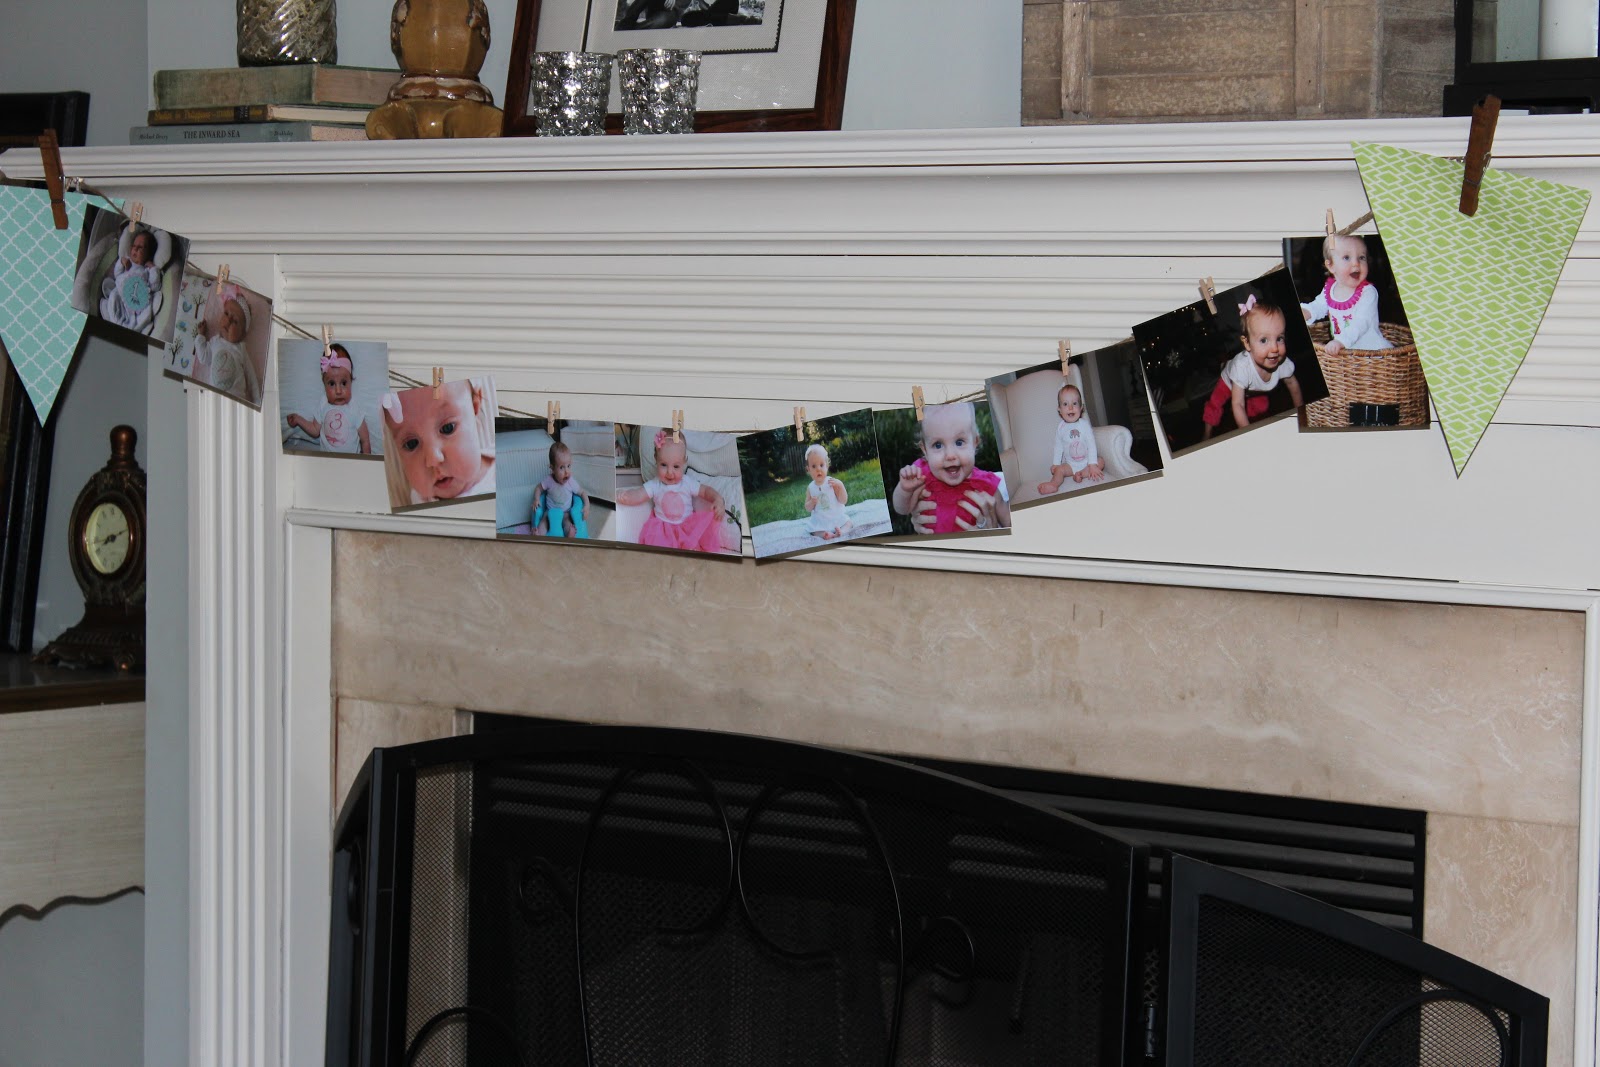
Today we celebrated Abigail's first birthday with friends and family! It was a wonderful day and I feel so lucky to have amazing people in our lives that love and pray for our daughter. I love to host parties and showers but this one was especially fun to decorate for! Here are the banners I made for my sweet Abigail.
I strung pictures from each month across the mantle. I feel like you can see her little personality coming through a little more each month!
Next, I made a "Happy Birthday" chalkboard banner for my linen board in the kitchen.
And then we have this one over the buffet in the dining room! Maybe I got a little carried away but it's her FIRST birthday...
We had simple pink and white decorations mostly made of candy. Aren't these little cake pops cute?
My friend Jana from Columbia started her own business called JC Cakes and Cupcakes and she made this sweet little Owl cake for Abigail! So cute!
Here's my little birthday girl just up from her nap! My friend Melissa at Vanderbilt made her tutu and it was perfect!
Here's Mike getting the little smash cake all ready. This is where Abigail started to get pretty confused :)
Abigail is such a quiet and reserved little baby and all the singing and flashing cameras might have overstimulated her a little bit.
And we're definitely melting down now :)
My sweet baby. I love this picture and I hope she always knows I will keep her safe.
Daddy made it all better. And then... she ate a lot of cake!
After cake, singing, and presents, this wired little girl played with her new toys and loved on her Grandparents! Her grandaddy always keeps a container of mints in his shirt pocket. It makes the perfect rattle of course!
I strung pictures from each month across the mantle. I feel like you can see her little personality coming through a little more each month!
Next, I made a "Happy Birthday" chalkboard banner for my linen board in the kitchen.
And then we have this one over the buffet in the dining room! Maybe I got a little carried away but it's her FIRST birthday...
We had simple pink and white decorations mostly made of candy. Aren't these little cake pops cute?
My friend Jana from Columbia started her own business called JC Cakes and Cupcakes and she made this sweet little Owl cake for Abigail! So cute!
Here's my little birthday girl just up from her nap! My friend Melissa at Vanderbilt made her tutu and it was perfect!
Here's Mike getting the little smash cake all ready. This is where Abigail started to get pretty confused :)
Abigail is such a quiet and reserved little baby and all the singing and flashing cameras might have overstimulated her a little bit.
And we're definitely melting down now :)
My sweet baby. I love this picture and I hope she always knows I will keep her safe.
Daddy made it all better. And then... she ate a lot of cake!
After cake, singing, and presents, this wired little girl played with her new toys and loved on her Grandparents! Her grandaddy always keeps a container of mints in his shirt pocket. It makes the perfect rattle of course!
Playing with Doo Da!
Abigail Elizabeth, you make my heart smile! I am so thankful for your little giggles and all the unique expressions that only you can make. We had so much fun celebrating your first birthday and we are overcome with JOY as we look back over your first year of life! Here is what you are doing at 12 months:
* Hugging and Kissing
* Loving on your baby dolls
* Eating a few new foods: eggs, olives, onions, and peppers
* You tried Sweet Ce Ce's for the first time
* You refuse to drink Cow's milk. You make an awful face and let it run out of your mouth
* You try to put your face under water in the bathtub
* You are standing and starting to only hold on with one hand but you are pretty cautious and not ready to walk
* You LOVE to pull everything out of the cabinets.
A look back at your first year of life.
Saturday, January 5, 2013
Oh Pinterest...
I am really excited about our new wall display in the kitchen! I saw a similar idea on Pinterest a few years ago and finally decided it was time to make my own. I'm really pleased with how it turned out and I especially love reading the lyrics on this distressed piece of wood each time I pass by. These words are in the bridge of one of my favorite worship songs. If you don't know it, you should! You can check out the song here "Forever Reign".
Oh Pinterest...you may get me in trouble soon! It seems that each time Abigail is asleep, I find my self coming up with new projects and decorating some little corner of our house. Here is my other small project that I am finished with. This is my favorite piece of furniture, passed down from my grandmother. I have slowly collected memorable pictures and special pieces to display and I am finally done! Here is how it turned out!
Pictures are so special to me so I love having different ways of sprinkling them through our home. The iron candle holder was a present from my sweet husband last year for my birthday and the vintage books were a lucky find in the basement of our new church building. It makes me happy to see things around our house that have a story behind them and I thought I would share a little piece of that with you!
Oh Pinterest...you may get me in trouble soon! It seems that each time Abigail is asleep, I find my self coming up with new projects and decorating some little corner of our house. Here is my other small project that I am finished with. This is my favorite piece of furniture, passed down from my grandmother. I have slowly collected memorable pictures and special pieces to display and I am finally done! Here is how it turned out!
Pictures are so special to me so I love having different ways of sprinkling them through our home. The iron candle holder was a present from my sweet husband last year for my birthday and the vintage books were a lucky find in the basement of our new church building. It makes me happy to see things around our house that have a story behind them and I thought I would share a little piece of that with you!
Monday, December 31, 2012
Subscribe to:
Posts (Atom)


.jpg)